Transplanting is an essential skill for cannabis growers, ensuring the plant’s root system has enough space to grow and thrive. Whether you’re a novice or a seasoned grower, understanding when and how to transplant your cannabis can make all the difference in your plant’s health and final yield. Let’s delve into the intricacies of this process.
Why Transplant Cannabis?
Transplanting offers numerous benefits:
Root Expansion: As plants grow, their roots need more space. A confined root system can lead to stunted growth and reduced yield.
Health Check: Transplanting allows you to inspect the root system for signs of diseases or pests.
Fresh Soil: It provides the plant with fresh soil, which can rejuvenate nutrient levels.
Prevent Root Bound: Regular transplanting prevents the roots from becoming “root bound” where they circle the container, which can choke the plant.
When to Transplant Cannabis:
Initial Signs of Crowded Roots: If roots start growing out of the drainage holes or circling the topsoil, it’s time to transplant.
Plant Size: A general rule of thumb is when the plant’s height is three times the diameter of its pot, or when its leaves reach the edge of the container.
Number of Leaves: Seedlings are typically ready for their first transplant once they’ve developed 2-3 sets of true leaves.
Growth Stagnation: If the plant stops growing but appears healthy, it might be root-bound and requires a larger container.
How to Transplant Cannabis:
1. Gather Necessary Supplies:
- A new pot (typically 2-3 times larger than the current one)
- Fresh potting mix (preferably cannabis-friendly)
- A trowel or hand shovel
- Water
2. Prepare the New Pot:
- Fill the new container partially with fresh soil.
- Create a well in the center, approximately the size of the current plant’s root ball.
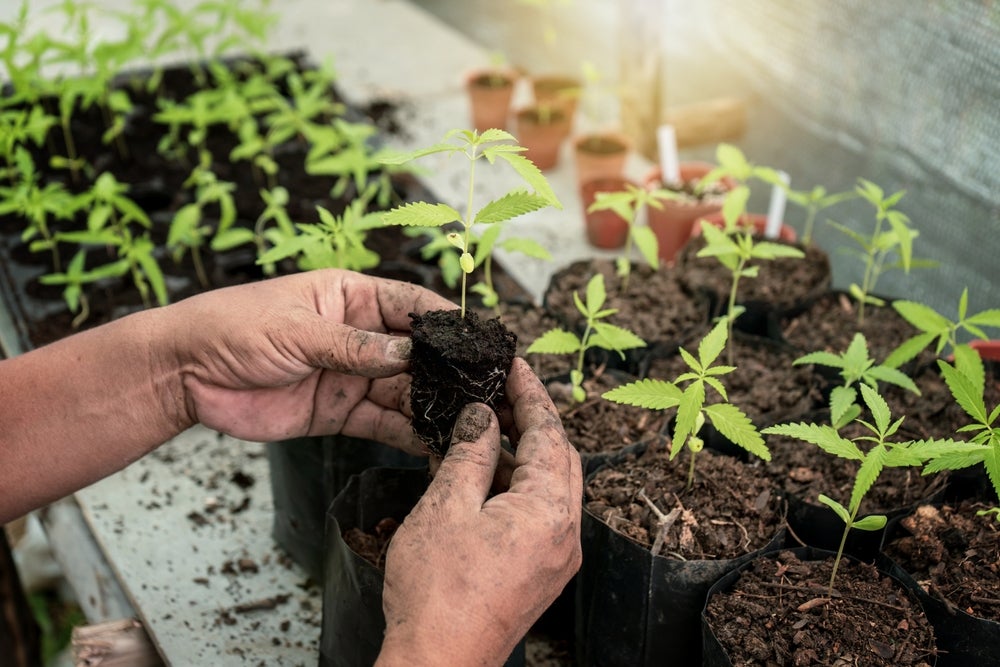
3. Remove the Cannabis Plant:
- Water the plant lightly a few hours before transplanting. This makes the soil more cohesive and reduces root damage.
- Turn the pot sideways, hold the plant’s base, and gently tap the container’s edges until the plant and its root ball come out.
4. Inspect the Roots:
- Check for signs of disease (like dark, mushy roots) or pests.
- If the plant is root-bound (roots circling the pot), gently tease them apart with your fingers.
5. Place in the New Pot:
- Position the plant in the new pot’s center, ensuring it’s at the same depth as before.
- Fill in around the plant with fresh soil, patting gently to remove air pockets.
6. Water Generously:
- Water the plant thoroughly, allowing excess water to drain out. This helps settle the soil and ensures good root-to-soil contact.
7. Monitor the Plant:
- After transplanting, the plant may experience “transplant shock,” appearing droopy or stressed. Usually, they’ll recover in a few days with proper care.
- Ensure the plant is in a stable environment with appropriate light, temperature, and humidity levels.
Tips for Successful Transplanting:
Pot Choice: Choose pots with ample drainage holes. Fabric pots or air pots can be particularly good for cannabis as they allow for better aeration.
Soil Choice: Opt for a well-draining soil mix. Cannabis-specific soils often come with a balanced pH and necessary nutrients.
Minimize Stress: Try to transplant in the evening or during cooler parts of the day to reduce plant stress.
Avoid Overwatering: While the plant needs water post-transplant, be careful not to overwater, as this can suffocate the roots and cause rot.
Conclusion:
Transplanting cannabis is an essential practice to ensure your plant’s optimal health and growth. While it might seem daunting, with the right tools and techniques, the process can be smooth and stress-free. By understanding when and how to transplant, you set the stage for a thriving cannabis plant and a bountiful harvest. Happy growing!